

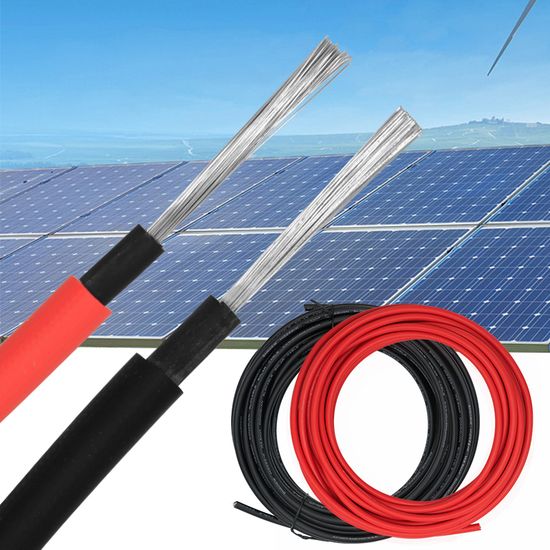
In a solar PV system, most of the attention goes to the panels, the inverter, or the batteries. Yet there’s a simple component that matters just as much: the DC cable that carries power from the panels to the inverter. This cable carries every bit of energy the panels capture, so its size shouldn’t be chosen at random.
An undersized cable is forced to work beyond its limits. As a result, it heats up, voltage drops before reaching the inverter, and over time the insulation can break down, raising the risk of fire. This guide explains how to choose a safe and efficient solar panel cable size for your installation.
Why Does DC Cable Size Matter?
Cable size, expressed as cross-sectional area (mm²), determines how well a cable carries electricity. There are three main reasons to get it right:
- Matching current-carrying capacity. Every cable size has a limit on how much current it can safely carry continuously. If the current from the panels exceeds that limit, the cable is pushed beyond what it can handle.
- Reducing voltage drop. The smaller the cross-section and the longer the cable, the higher its resistance. Some of the energy is lost along the way before it reaches the inverter.
- Preventing overheating and keeping the system efficient. Cable resistance turns part of the electrical energy into heat. Constant heat speeds up insulation aging and reduces the energy you can actually use.
Factors That Determine DC Cable Size
There’s no single cable size that suits every installation. Consider the following factors:
- System current and voltage. String current is set by the panel current, while string voltage depends on how many panels are wired in series. Low-voltage systems, such as 12 V or 24 V off-grid setups, carry much higher current for the same power, so they need thicker cables.
- Cable length from the panels to the inverter. Longer runs add resistance. Remember that DC power flows through two conductors, positive and negative, so the length you calculate covers the route there and back.
- Conductor type and material. Copper has lower resistance than aluminum. PV cables typically use tinned copper, which holds up better against corrosion.
- Ambient temperature and installation method. Cables on a sun-baked roof or bundled tightly inside conduit can carry less current than cables in cool, open air.
- Allowable voltage drop. On the DC side, many designers aim for a maximum voltage drop of around 1–3% to keep energy losses low.
How to Determine DC Cable Size
Here are the practical steps for sizing cables for solar panels:
Step 1: Check the maximum current ratings of the panels and inverter. Look up the short-circuit current (Isc) and maximum power current (Imp) on the panel datasheet, as well as the inverter’s input current limit. As a safety margin, the cable design current is usually taken as at least 1.25 times Isc.
Step 2: Measure the total cable run. Measure the distance from the farthest panel to the inverter, including bends and vertical runs. Multiply by two to get the combined length of the positive and negative cables.
Step 3: Set an appropriate voltage drop limit. Use this simple formula: voltage drop (V) = 2 × one-way length (m) × current (A) × 0.0175 ÷ cross-sectional area (mm²). The figure 0.0175 is the resistivity of copper in Ω·mm²/m. Compare the result with the system voltage to get the percentage.
Step 4: Match the cross-section to your calculations and installation standards. Choose a size that meets both conditions: its current-carrying capacity is above the design current, and its voltage drop is below your set limit. Also make sure the cable complies with the applicable electrical installation standards.
Worked example. A string has 10 panels with an operating voltage of about 41 V each (around 410 V in total) and a current of 13 A. The one-way distance to the inverter is 30 m. With 4 mm² cable, voltage drop = 2 × 30 × 13 × 0.0175 ÷ 4 ≈ 3.4 V, or about 0.8% of 410 V. With 2.5 mm² cable, it comes to ≈ 5.5 V, or about 1.3%. Both are under 3%, but the 4 mm² cable gives a better margin for safety and efficiency.
Common DC Cable Sizes for Solar Panels
As a general guide, these are the cable sizes most often used in solar PV installations:
2.5 mm² cable. Suitable for certain applications, such as high-voltage strings with moderate panel current and short cable runs.
4 mm² cable. The most common size for residential and commercial rooftop strings, especially with modern high-current panels or longer distances to the inverter.
6 mm² cable or larger. Used where higher current capacity or long runs are needed, such as several strings combined in parallel, low-voltage off-grid systems, or cables running to a distant combiner box.
Keep in mind that the final size should be based on technical calculations, not just the panels’ wattage. Two systems with the same total power can need different cables because their voltage, current, and cable runs differ.
Mistakes to Avoid
These common mistakes can compromise both the safety and performance of your system:
- Choosing cables on price alone. Cheap cables with undersized conductors or poor-quality insulation can cause serious problems down the line.
- Ignoring cable length and voltage drop. A size that works safely for a 10-meter run may not be efficient for a 40-meter run.
- Using cables not designed for PV installations. Ordinary household wiring isn’t built to withstand UV exposure, high temperatures, and the DC voltages of a solar system.
- Overlooking connectors, overcurrent protection, and environmental conditions. Use compatible, properly crimped connectors, install DC fuses or breakers where needed, and protect cable runs from standing water, abrasion, and rodents.
FAQ: Solar Panel DC Cables
What’s the difference between solar DC cable and regular electrical cable?
PV-specific DC cables have double insulation that resists UV, ozone, and high temperatures, and they’re rated for DC voltages up to 1,000–1,500 V. Their conductors are usually flexible, stranded tinned copper that resists corrosion. Regular electrical cable isn’t designed for these conditions.
Is a thicker DC cable always better?
In terms of resistance, a thicker cable does mean less voltage drop. But oversizing adds cost and can make installation harder, for example if the cable doesn’t fit the connectors or inverter terminals. Choose the right size based on calculations, not simply the biggest one available.
How does cable length affect PV system efficiency?
The longer the cable, the higher the resistance and the more energy is lost as heat. That’s why cable runs should be kept as short as possible and the inverter placed reasonably close to the panels.
Do solar panel cables need to be UV- and weather-resistant?
Yes. DC cables are usually installed on the roof and exposed to sun, rain, and temperature swings for decades. Choose cables that meet PV cable standards such as EN 50618 or IEC 62930 so they stay safe throughout the system’s lifetime.
When should you go up a cable size?
Upsize the cable if the calculated voltage drop exceeds your limit, the design current is close to the cable’s rating, the run is very long, the cable is installed in a hot environment, or several strings share one route.
DC cable size should match the current, cable run, voltage drop, and installation conditions. Getting the calculation right helps prevent overheating, keeps the voltage stable, and ensures energy travels from the panels to the inverter with minimal loss. Using PV-rated solar panel cable in the right size protects both the safety and performance of your solar PV system over the long term.
Want to make sure your PV installation uses the right cables and components? The ATW Solar team is ready to help, from technical calculations and standards-compliant component selection to a safe, tidy installation.